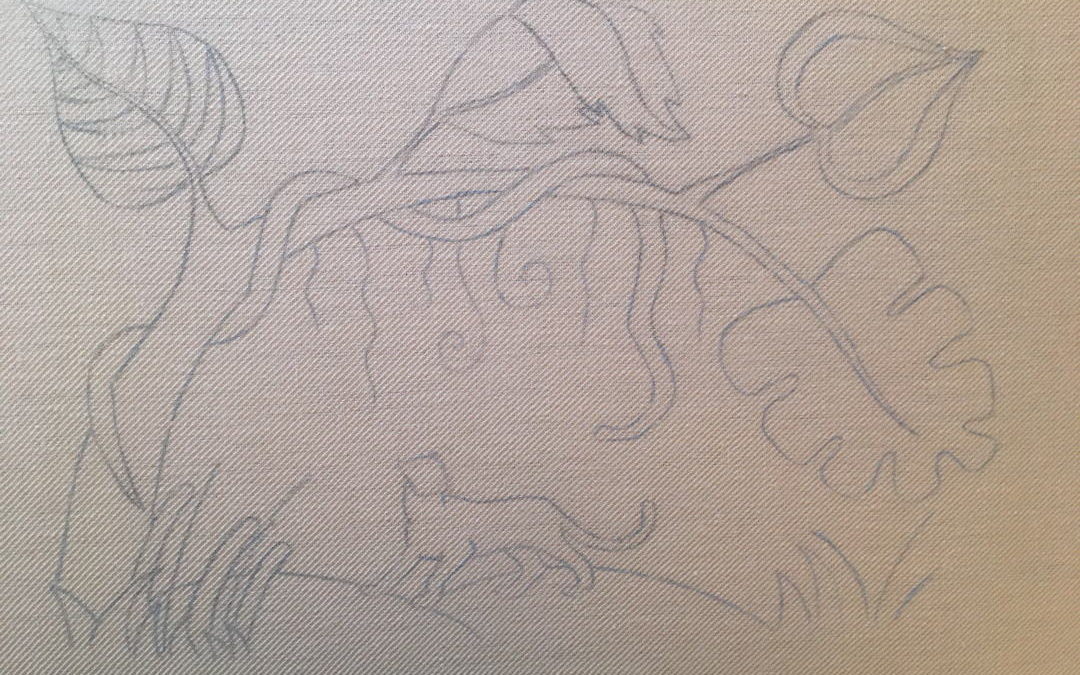
With the design transferred to the linen twill, all that remained was to start stitching! The areas of a crewelwork design that are worked first are the background elements, which are often stitched in filling stitches (so-called because they ‘fill’ the linen twill) but can also be stitched using a combination of outline stitches to create a filled effect.
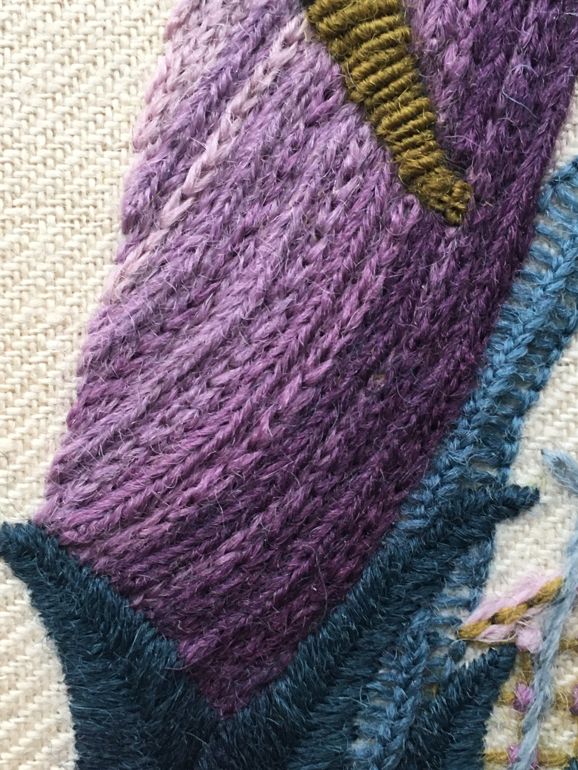
I knew I wanted a mauve stem (trunk), so this seemed like a good place to start stitching. I also knew I wanted to create a textured stem, so, inspired by one of the designs in Tracy A. Franklin’s book Crewel Work, I chose a repeating motif of outline stitches in chain stitch/split stitch/heavy chain stitch/split stitch. I also swirled the direction of the stitches up and along the trunk. The result, I hope, is an authentic, gnarly look! I also added some woven wheels to the tree for knots!

Gnarly stem in chain/split/heavy chain/split stitch

Knots stitched in woven wheels
One of my favourite filling stitches is trellis. It is a very traditional stitch in Jacobean Crewelwork and our tutor recommended covering at least two areas in trellis; I chose the top right leaf and left hillock in order to balance the stitch across the design. As you can see, trellis can be worked in any direction with multiple layers of trellis and a variety of securing stitches, and, although it is a filling stitch, it can be quite an open stitch depending on the design used.

Hillock stitched in horizontal trellis with cross-stitch holding stitch

Leaf stitched in four layers of battlement filling
A new filling stitch for me in this piece was laid stitch, which is apparently what the Bayeux tapestry (which, despite the name, is actually an embroidery!) is stitched in. I stitched the underside of the top middle leaf in laid stitch (blues) and the topside in block shading (mauves), inspired by a leaf that had caught my eye in a magazine during the design stage. The challenge with both stitches is keeping them parallel!

Inspiration for the design

Leaf in laid stitch and block shading
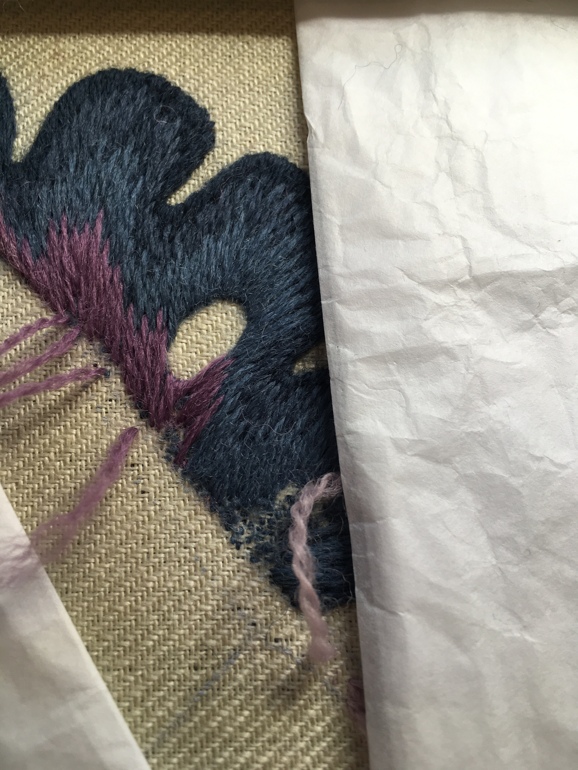
Long and short is another traditional crewelwork filling stitch and can be used to beautiful effect, although it is not easy! This is the stitch used in silk shading and it is also called ‘painting with a needle’. The idea is to create a gradual shaded effect. I stitched the outermost edge of the Monstera leaf in the second darkest blue and then stitched each new row in a lighter shade until the final two rows at the centre, which I stitched in mauve. I really like how the mauve threads ‘pop’ against the blue. To ensure I kept a balance of open and solid areas, I kept the opposite side of the leaf open, filling it with a few ‘holes’ in split stitch and outlining it with buttonhole stitch.

Long and short – in progress…

Long and short – yet more progress…

Long and short – almost there…

The finished leaf in long and short
I also included two animals in the design: a snake and a leopard. My husband is a big fan of big cats, so it was a no-brainer to include one of those! The leopard is stitched in seed stitch, another filling stitch, which is made up of small stitches, like seeds, whose density can be varied to create a shaded effect. The snake is stitched in raised stem band, where you first stitch a ladder base and then weave lines of thread up it – literally snakes and ladders! The challenge with the snake was deciding where to start weaving the thread so that the yellow stripe started and ended at the correct points along his body to create the winding effect. The snake is also padded with felt in places to raise him above the trunk. I’ve done padding in Goldwork but didn’t know it could be used in crewelwork. It was great fun to do but the crewel wool was a little reluctant to go over it!

Close-up of leopard’s face

Body of the snake, stitched in raised stem band on felt padding

Leopard stitched in seed stitch with split-stitch outline

Snake’s head stiched in satin stitch with body in raised stem band
I hope you enjoyed seeing how the main elements of the design were added to the piece. In my next post, I’ll show you how all the smaller elements and outlines were added to create the finished piece!
Il disegno trasferito al twill di lino, non restava che iniziare a cucire! Le aree di un ricamo in lana che vengono cucite per prime sono gli elementi di sfondo, che sono spesso cuciti con punti di riempimento (cosiddetti perché “riempiono” il twill di lino) ma possono anche essere cuciti usando una combinazione di punti di contorno per creare un un effetto pieno.
Sapevo di volere uno stelo (tronco) di colore malva, quindi questo sembrava un buon punto per iniziare a cucire. Sapevo anche di voler creare uno stelo testurizzato, quindi, ispirandomi a uno dei disegni nel libro Crewel Work di Tracy A. Franklin, ho scelto un motivo ripetuto di punti di contorno in punto catenella/punto spezzato/grosso punto catenella/punto spezzato. Ho anche fatto roteare la direzione dei punti su e lungo il tronco. Il risultato, spero, è un aspetto autentico e nodoso! Ho anche aggiunto alcune ragnetti tessuti all’albero per dei nodi!

Stelo nodoso cucito a punto catenella/punto spezzato/grosso punto catenella/punto spezzato

Nodi cuciti con ruote intrecciate
Uno dei miei punti di riempimento preferiti è il fondo quadrato. È un punto molto tradizionale in ricamo in lana dell’epoca del Giacomo I e la nostra insegnante ci ha consigliate di coprire almeno due aree in questo punto. Ho scelto la foglia in alto a destra e la collinetta sinistra per bilanciare il punto sul disegno. Come puoi vedere, il fondo quadrato può essere cucito in qualsiasi direzione con più strati di filo (chiamato ‘fondo tridimensionale’) e una varietà di punti di fissaggio e, sebbene sia un punto di riempimento, può essere un punto abbastanza aperto a seconda del disegno scelto.

Collinetta effettuata in fondo quadrato con un piccolo punto croce in corrispondenza di ogni intersezione

Fondino tridimensioanle a quattro strati
Un nuovo punto di riempimento per me in questo ricamo è stato il punto disteso, che, apparentemente, è quello in cui è cucito l’arazzo di Bayeux (che, nonostante il nome, è in realtà un ricamo!). La parte inferiore della foglia centrale superiore è effettuata in punto disteso (blu) e la parte superiore è effettuata nel blocco ombreggiatura (malva), ispirata a una foglia in una rivista che aveva attirato la mia attenzione durante la fase di progettazione. La prova con entrambi i punti è mantenerli paralleli!

Ispirazione per il design

Foglia cucita a punto disteso e blocco ombreggiatura
Il punto pittura è un altro punto di riempimento tradizionalmente utilizzato nel ricamo in lana e può essere usato con buoni risultati, sebbene non sia facile! Questo è il punto utilizzato per punto pittura in seta. L’idea è di creare un graduale effetto sfumato. Ho cucito il bordo esterno della foglia di Monstera nel secondo colore blu più scuro e poi ho cucito ogni nuova riga di punti in una tonalità più chiara fino alle ultime due righe al centro, che ho cucito in lana di colore malva. Mi piace molto come i fili color malva “brillano” contro il blu. Per garantire l’equilibrio delle aree aperte e piene, ho tenuto aperto il lato opposto della foglia, riempiendolo con alcuni “fori” a punto spezzato e delineandolo con il punto festone fitto.

Il punto pittura in corso…

Il punto pittura – ancora più progresso…

Il punto pittura – quasi finito…

La foglia a punto pittura finita
Ho anche incluso due animali nel disegno: un serpente e un leopardo. Mio marito è un grande fan dei grandi felini, quindi è stato un gioco da ragazzi includerne uno! Il leopardo è cucito a punto seme, un altro punto di riempimento, che è costituito da piccoli punti, come i semi, la cui densità può essere variata per creare un effetto sfumato. Il serpente è cucito con il punto erba in rilievo, dove prima si cuce una base di punti a forma di scala dall’alto verso il basso e poi si intreccia linee di filo su di essa – letteralmente scale e serpenti! La prova con il serpente era decidere da dove iniziare a tessere il filo in modo che la striscia gialla iniziasse e finisse nei punti corretti lungo il suo corpo per creare l’effetto avvolgente. Il serpente è anche imbottito di feltro in punti per sollevarlo sopra il tronco. Ho usato questo metodo di imbottiture in ricamo in oro ma non sapevo che potesse essere usato nel ricamo in lana. È stato molto divertente da fare, ma la lana crewel era piuttosto riluttante a scivolarci sopra!

La faccia del leopardo

ll corpo del serpente cucito a punto erba in rilievo

Il leopardo cucito a punto seme con un contorno cucito a punto spezzato

La testa del serpente
Spero che vi siate divertiti a vedere come gli elementi principali del disegno sono stati aggiunti al ricamo. Nel mio prossimo post, vi mostrerò come sono stati aggiunti tutti i contorni e gli elementi più piccoli per creare il ricamo finito!


Recent Comments